Saturday 28 April 2012

Tiny top hats 2: the hats strike back

As I promised, here's a more in-depth look at how I'm constructing my teacup tophats and the little things I'm learning on the way!

I'll preface this by saying that I'm basing these off the tutorial I found here, at offbeatbride.com . There was no template provided, and very few photographs of the intermediate steps, so I had to sort of blunder my way along, figuring it out visually as I went.

Let's begin!
I roughed out my own template (as you can see on my last post) for my prototype hat, but found that my ability to draw uniform circles was lacking, so I mapped out the template in Adobe Illustrator and had everything I needed!
Seen here chilling out max and relaxing all cool with my prototype hat.
Step one was to cut out all the shapes in cardboard, graciously provided by a macaroni box!
it was the perfect size and obviously chosen by fate.
Once I had the shapes cut out of cardboard, I realized two things.
  1. the fabric I had chosen was just sheer enough to see through to the cardboard under the right light and
  2. I probably didn't need to cut the centre of the brim out, seeing as I was just going to cover that with fabric later.
Lesson learned though, I added that to my 'remember' list for next time.

Step two, for this hat, was to cover the cardboard bits with some blue felt to serve two purposes. Firstly, to keep the cardboard from showing through, and it also gives it a more soft, plush feel, which was rather nice.
it's like clothes for the cardboard.
I cut the rough shape of the piece before gluing it to the cardboard, then trimmed around the edges of the felt after it was dry, to make sure it was the exact shape I wanted.

After that, I started attaching the fabric!
no one but you will know I'm wearing a macaroni box on my head. sssh. Secrets.

you stick it felt-side-down on the fabric you chose, and glue on the inside of the cardboard, and then pull the fabric in over the edges until it's even and stuck firmly.
The instructions on the website recommended using spray adhesive, but I don't have any on hand, so I ended up using hot glue for everything. And throwing down hot glue all over the front of the panel would have looked like a terrible insult to fashion.
All wrapped up.

As you're gluing the fabric down, make sure the edges are at least mostly uniform and there are no wrinkles in the fabric.

for the brim of the hat, I wanted it to have a slight curve to it, so I soaked the cardboard in water before attaching the felt and fabric to it, and tied it to this tube so it would dry and keep the shape. I forgot to take a photo of that, so here's another image of it already wrapped in fabric, in the same position!

you're not going anywhere...
After you've applied the fabric to all the pieces, comes the fun part.
And by fun I mean long, tedious and tricky part. I needed to attach the crown of the hat to the barrel, and having learned from my first experiment, I knew I had to attach the barrel to the crown BEFORE closing the barrel up.

This is exactly what it looks like. You apply some glue to the inside of the barrel and stick the crown to it and hold it.
And wait.
And wait some more until it dries.
And then you'll probably want to add some more glue to reinforce it and make sure it all stays stuck.
Prepare yourself for an ocean of glue.
Also, it's worth pointing out at this stage that it's important to remember where your hot glue gun is at all times.
You wouldn't want to, say, set your hand down haphazardly and stick your finger right into the searing-hot metal tip.
That would be silly.
First aid kits are important no matter what you're doing.

I'll take another moment here to lay down some more advice, so you can learn from my fail. 
Check and double check your templates and pieces o make sure they fit. Mine didn't close completely in the back, possibly because I fudged the shape of the barrel, an possibly because I added the extra girth of felt to the mix.
FFFFFUUUUUU--
Thankfully, with a bit of creative gluing and some adjustment of the barrel's shape, I managed to mostly close the gap, and went ahead and added the lace ribbon around the base of the hat.


After that, I cut a circle of fabric for the naked bottom of my brim.
Indecent nudity.
I took the website's advice and made the piece larger than the brim, and then I trimmed it back once the glue was dry. This makes it much more uniform afterwards, even though when you're wearing it, people probably won't be seeing the underside of this hat.

Adorable!

Unfortunately I'm not quite able to finish it, as I've forgotten some of my feathers and decorations at a friend's house, but this should give you an idea of the finished product.
The feathers and pendant will completely cover the gap in the back, and then become the front of the hat!

Giant hand not included in the final product.

So there you have it! Phase two of my hat making journey.
I still plan to make several more and investigate an etsy shop to facilitate sales.

As always, I appreciate any comments and feedback you might have!
Thanks for reading!


-JessB
Friday 27 April 2012

tiny top hats! Oh god D:

So part of my costume is going to be a little teacup tophat! And I'm going to make it myself, like a boss.


So I spread my materials out on the table, prayed to the elder gods for wisdom, and dove into it headfirst.

After about three hours of madness, and more hot glue borns than I'll ever admit, and a lot of learning, my prototype is complete!

the face of a madman.

I've learned several important things in assembling these. The first of which being that I should have bought spray adhesive, lol. Also, i ned to glue the barrel of the hat to the top portion BEFORE I stick the ends of the barrel together, that was so weird and unwieldy, and you can see glue sticking out.

Though, I'm looking forward to perfecting this craft, and I plan on somehow selling the extras I make :) because a meter of fabric is more than I remember, haha.

Stay tuned in later for an actual progress update on the real version!
Thanks for reading!
-JessB

Wednesday 25 April 2012

Latex horn!

My second attempt at latex prosthetics is going well, in my humble opinion. Let me walk you through my adventures!

I started by making a form out of super sculpey in the shape I wanted, making sure it fit on my head in the position I wanted.
Unfortunately I have no photos of this part, but it's not difficult to imagine.

Than I started laying on the liquid latex.
I bought that bottle at some seasonal halloween store a couple years ago for $20. It's the only kind I've used, so I really don't have anything to compare it against. It's a little bit runny, but it works pretty well.

It took about eight coats of the stuff to get the horn to the thickness I wanted, even then, after I peeled it off it looked like it could have used another few coats. But it's sturdy, and it looks pretty good!
Removing it from the base was kinda tricky, as you have to peel it very slowly and apply a powder base to keep the prosthetic from sticking to itself.
I used baby powder because I have it on hand, but you can use special craft powder or even a makeup powder.

here you can se the difference between powdered and unpowdered portions.

some before and after shots. here's also a big difference in the heft of the horn before the tissue and paint is added.

After it was all powdered and peeled, I started laying in some colour! I'm using acrylic paint, and it seems to be holding up pretty well! I also used a bit of torn tissue and liquid latex around the base of the horn to give the appearance if it breaking through the skin.
I then painted the raised 'skin' elements with varying shades of pink and red.

Unfortunately, due to wardrobe issues, I've had to change my colour scheme from black/neon green to black/electric blue.
I'm not too beat up though, blue looks just as amazing!

 After the blue dried, I painted the black on the top portions and blended it into the blue section with a feathered, spiky sort of look to it.
Then it was just a matter of adjusting the 'spikes' where the colours met, and adding a darker blue shadow underneath the 'skin' for depth!
Now all I have to to is make another one, and I'm set! I'm considering making the blue aspect a little less prominent though. Comment with your opinions!

thanks for reading!
-JessB

Monday 23 April 2012

Carnival fashion!

I've got a new project in the works, and it's pretty different from my usual thing. I don't want to spoil the final thing just yet, but I'll set up some backstory and info, and I'm sure you're all perceptive enough to see where I'm going with this!

So there's a new musical making its way around North America, and Toronto is lucky enough to be on its list of stops as the only Canadian venue! It's very exciting stuff, and my friend and I were lucky enough to snag some tickets!

It's called The Devil's Carnival, and it's by the same genius madmen that gave us Repo! The Genetic opera.
TDC logo
In a similar vein as their Repo! stage tour, Darren Lynn Bousman and Terrance Zdunich are packing up their carnival train and taking their movie from city to city, rock-concert style.

Now, I'm sure by this information alone you're beginning to think this probably isn't the sort of movie one would go to and sit in a quiet, polite theatre full of average people for an average theatre experience.
That would be boring.
Thankfully, TDC expects and in fact encourages people to show up in costume, and would probably be depressed and offended if people sat politely and silently in the theatre during the show.

From what I've seen and heard from others, it has a sort of Rocky Horror feel to it, where audience participation is as much a part of the show as the movie is.

~-*-~

So, you may not know me very well, so I'll let you in on a little secret about me.
I LOVE to dress up. If there's an excuse for me to dress up in costume, I'll usually jump on that in a heartbeat, and this show is no different!
I've had a lot of fun in the past at Zombie walks and conventions, where I've made my own costumes and basically had the time of my life.

Anime North 2011 -Black mage from Final fantasy 1

Hamilton Zombie walk 2011 -made some latex prosthetics for my face and arms


Hamilton Zombie walk 2010, I was poor, so no prosthetics this time.
Fun fact: all my makeup for this photo was done with eyeshadow and lipstick!

So yeah, leave me alone with some makeup and an idea, and I'm bound to end up in costume eventually.

All this rambling has a purpose, trust me. I've been scheming and planning my costume for the Devil's Carnival for weeks, and it's been in the back of my mind since I heard about it at the Repo! Pannel at comic-con in Toronto.

So, I'll leave you all with some sketches and ideas, and I'll be back with progress updates through the week!


Also, have some tasty informational links!
TDC website: www.thedevilscarnival.com


Facebook links!
TDC page
Darren Lynn Bousman-Director
Terrance Zdunich-Writer/actor

Thanks for reading!
-JessB

Tuesday 17 April 2012

Puzzled and confused.

It's funny how something you spend so little time on becomes something you love the best.
The word from illustration friday this week is 'Puzzled' and I knew almost immediately I wanted to do
A) A photo manipulation involving illustration
and
B) vintage feeling

I've been reading a bunch of old crusty comic books when I've had the time.
(the things I unearth when procrastination-cleaning are as unimaginable as they are entertaining sometimes.)
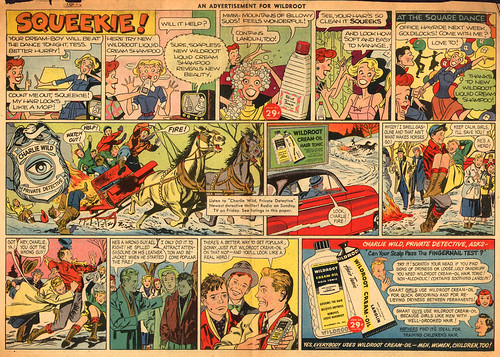
And I wanted to give this project that same sort of crispy paper sort of feel, so it felt vintage even though the subject matter didn't necessarily reflect this.

Squeekie01.jpeg
see- that sweet sweet comic page feeling.

It didn't take long to slap down a few sketches, and even then I had a bad case of 'first sketch override', which is basically the inability to think of any idea besides the first idea I put on the paper. I kind of haphazardly doodled other ideas, but the tipped bottle of nail polish really spoke to me, and there were oceans of stock photos waiting for me.
The little nail polish monster was perfect, and I ran with it. It's a much more simple idea and design than I usually do, but I've really been feeling simplicity lately, and find that less can certainly be more.

My first attempt wasn't exactly what I wanted, but still pretty cute.
I didn't bother adding the vintage feel to it, since I wasn't happy with the monster. I put it away for a few hours, went and played with my family's new air-popper popcorn machine and came back refreshed and with a new mind.
My mind spat this out and I'm in love with it.

It's intended more as a desktop wallpaper than anything else, right now :D Let me know if you'd like the full sized file to use!


Thanks for reading!
-JessB

I missed you, paint.

I'm alive, I promise!
I've been working on a mock billboard ad for Kodak, and I'm pretty much in love with it.

I was given free reign over content, style and tagline, and as per usual, went wacky.
I love going wacky. :)
Te only real criteria I had was the medium (Gouache paint) and I needed to accurately reproduce the corporate logo.

Here we have my finalized concept sketch, properly to scale and everything.
My concept was to have the tagline "Capture it" with the cartoon-style image of a man fishing up a shark! This would reference the tagline not only in the great capture of man vs. nature, but the need for people to capture these epic moments in photographs.

I dove into this full throttle and set up a background wash, making double sure to block out the logo area, I didn't want the wash colour to corrupt the colours in the logo.
I chose a bluegreen because I wanted to give the immediate impression of water or ocean to people who might only have a second to glance at the ad. From here I laid in colours and the design started to take shape!


I initially didn't want to use any sort of lineart, but I found it difficult to discern between certain elements without the help of a nice black line. Unfortunately these photographs are terrible, it looks much better in person.


The typography gave me sleepless nights. Eventually I settled on a nice visible black font, with the white font outlined in black as well.

I'll be photographing this in a billboard frame tomorrow, and I'll have some proper photos up then!

Thanks for reading!
-JessB